
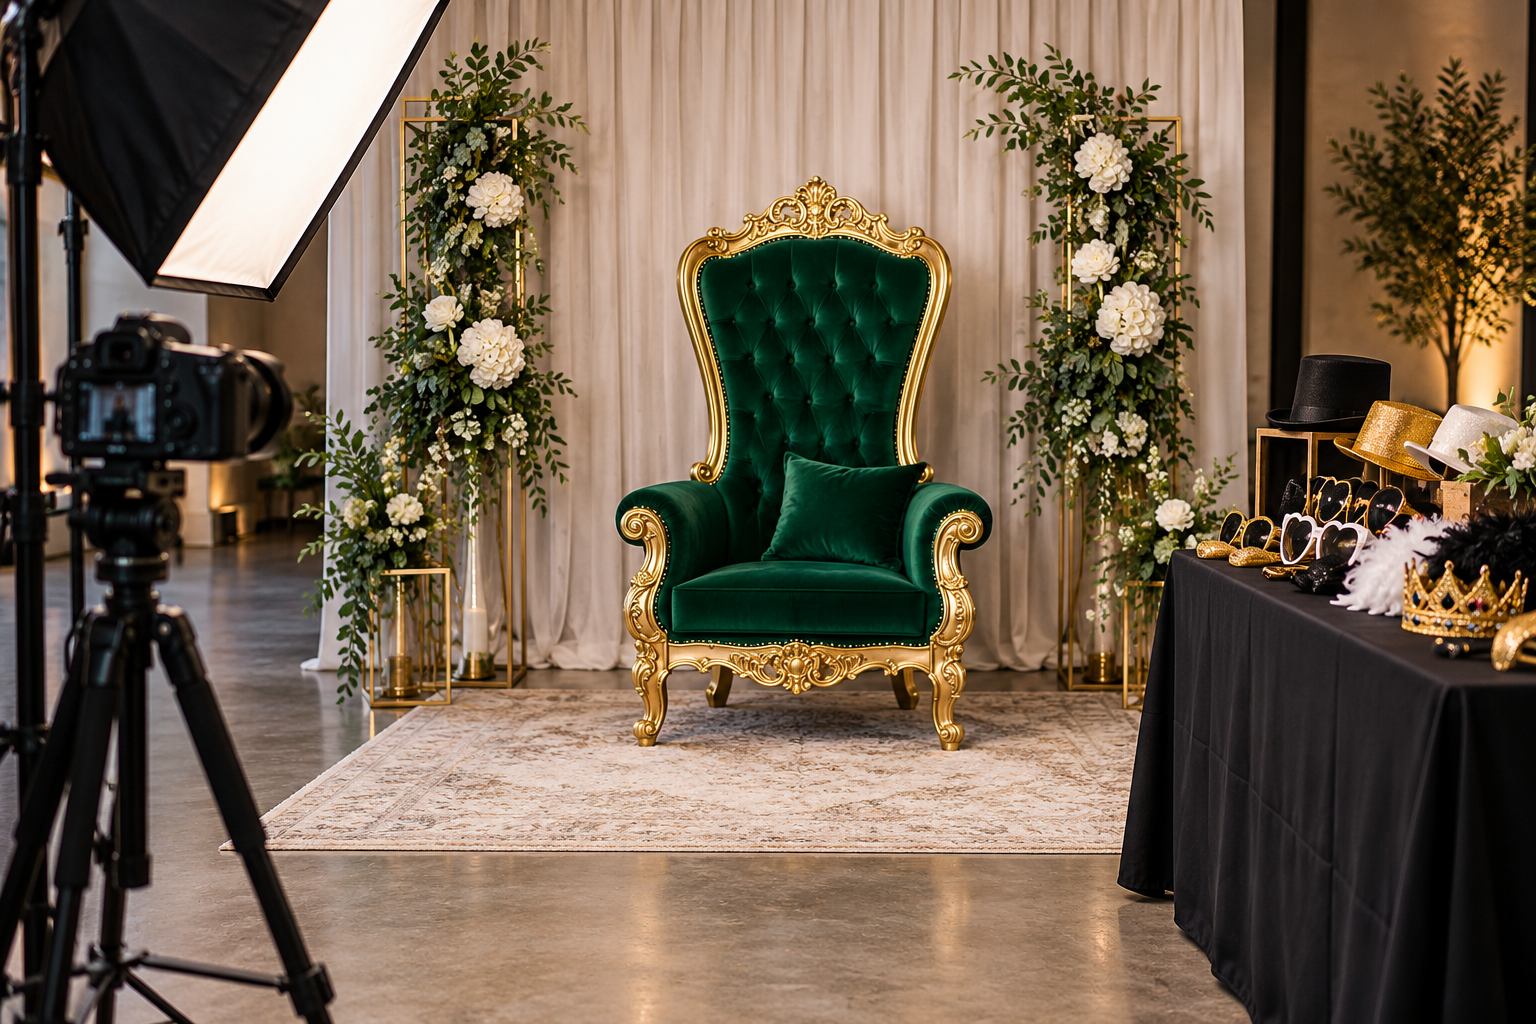
The best throne photograph begins with a person, not an empty-chair reveal. Their posture, clothing, expression, and relationship to the frame determine which parts of the design remain visible. Photo-Op Composition & Camera Angles explores how to build a portrait experience around that reality. Compare solo, couple, family, costume, and event-souvenir compositions, then plan the camera, lighting, backdrop, and approach space accordingly. A tall crest can frame a face or appear to grow awkwardly from it; reflective trim can add atmosphere or steal attention. Test those relationships through the intended image crop. This section also considers the activity outside the photograph, including queueing, optional props, clear hosting, cushion resets, and alternatives for guests who prefer to stand or use other seating. A booth makes participation understandable without requiring every visitor to perform the same royal pose. Whether creating an elegant studio portrait or a playful celebration corner, focus on the subject's experience and the complete operating scene. The throne should help people look and feel at ease while giving the photograph its distinctive sense of occasion.
Throne Foundations
- Choose the intended photograph first: individual portrait, couple, family group, costume study, or quick event souvenir.
- Match the throne's scale to the subjects and the planned camera framing.
- Leave room for people to approach, settle clothing, pose, and exit without crossing the camera setup.
- Test a seated subject before choosing the final camera height and lens position.
- Coordinate the backdrop with the throne's silhouette so the crown and shoulders remain distinct.
- Plan lighting for faces and upholstery together rather than illuminating only the decorative back.
- Decide which accessories belong in every shot and which remain optional.
- Provide an equivalent portrait option for guests who cannot or prefer not to use the throne.
- Define how staff reset cushions and props between groups.
- Record the final setup so framing and presentation remain consistent throughout the event.
Royal Facts
- A throne photographed empty can look very different once a person covers its central ornament.
- A high camera angle and a low camera angle change the apparent relationship between sitter and throne.
- Reflective trim can create bright distractions near faces under portrait lighting.
- A patterned background can compete with carved detail even when their colors coordinate.
- A large skirt, cape, or costume can occupy more seat area than ordinary clothing.
- A photo booth's operating space includes queueing and reset areas beyond the photograph's visible frame.
- Portrait orientation emphasizes height, while landscape framing gives more space to groups and surrounding scenery.
- A subject's face can be visually lost against a similarly toned cushion or background.
- A staged portrait does not require guests to adopt a serious royal expression.
- Identical camera settings do not guarantee identical results if lights, backdrop, or throne position move.
Royal Picks
- Create a seated test portrait with representative clothing before approving the booth layout.
- Use floor references that help staff restore the camera, throne, and light positions.
- Prepare a short posing menu offering relaxed, formal, playful, and standing options.
- Choose a backdrop sample large enough to assess texture and reflection through the camera.
- Keep optional handheld props in an organized station outside the main approach route.
- Use a reset photograph showing cushion placement and accessory orientation.
- Select a simple cleaning routine compatible with the actual upholstery and props.
- Build a group-size guide based on the throne's approved use and the photograph's framing.
- Keep delivery and privacy information clear when guests receive digital portraits.
- Assign a host to explain the experience and help maintain orderly movement.
Behind the Throne
- A tall crest directly behind the head can appear to grow from the sitter unless framing and pose are adjusted.
- A wide-angle close view may exaggerate nearby arms and hands, changing the intended throne proportions.
- A booth with many prop choices can slow the queue more than the photograph itself.
- Dark upholstery may retain shape better when lighting reveals texture rather than leaving it uniformly black.
- A couple's portrait can require a different composition from a solo image even when the same throne remains central.
- A small backdrop wrinkle may become prominent when lit from the side.
- A cushion reset protects visual consistency and can prevent the seating position drifting forward between groups.
- Guests may prefer to stand beside the throne; an intentional composition makes that option feel equally considered.
- A decorative crown placed above the sitter can be more effective than asking every guest to wear shared headwear.
- A final test using the actual image crop catches details that disappear in social or printed formats.
Throne Wonders
- Create a royal portrait booth with coordinated day-court and moon-court lighting looks.
- Design a paired composition showing the same guest in formal and playful poses.
- Explore a botanical backdrop that frames the throne without covering its silhouette.
- Build an oversized empty portrait frame around the scene while leaving an open approach.
- Develop a costume-friendly standing portrait beside a dragon-themed throne.
- Create a family arrangement that uses nearby coordinated seating within its approved capacity.
- Compare an uncluttered studio backdrop with a richly staged fantasy chamber.
- Design a monochrome portrait treatment that emphasizes carving, fabric, and facial expression.
- Offer guests a choice of solemn monarch, triumphant adventurer, or amused visitor poses.
- Document a consistent before-and-after booth reset image for staff training.
Throne FAQs
- How much room does a throne photo booth need? Measure the complete camera, lighting, approach, queue, and reset arrangement rather than only the chair.
- Should I photograph the throne empty first? Yes, but also test it occupied; people change which details remain visible and how the composition balances.
- What backdrop works best? Choose one that separates faces and the throne's outline while supporting the desired mood without excessive visual competition.
- Can several guests sit together? Follow the throne's approved use and capacity; create a different arrangement when the furniture is intended for one person.
- How do I avoid glare on metallic trim? Adjust light and camera relationships, then check the actual image rather than judging the scene only by eye.
- Does everyone have to sit? No. Plan an equally intentional standing or alternative-seating portrait composition.
- How can I speed up a busy booth? Simplify optional props, provide clear pose choices, and assign staff to manage approach and reset.
- Why does the throne look distorted? Camera distance, lens choice, and angle affect perspective; test a less exaggerated composition.
- What should staff reset between portraits? Check cushions, handheld props, visible debris, and any movement of the throne or surrounding setup.
- How should digital portrait delivery work? Explain the delivery method, timing, and handling of guest information clearly before collecting details.