
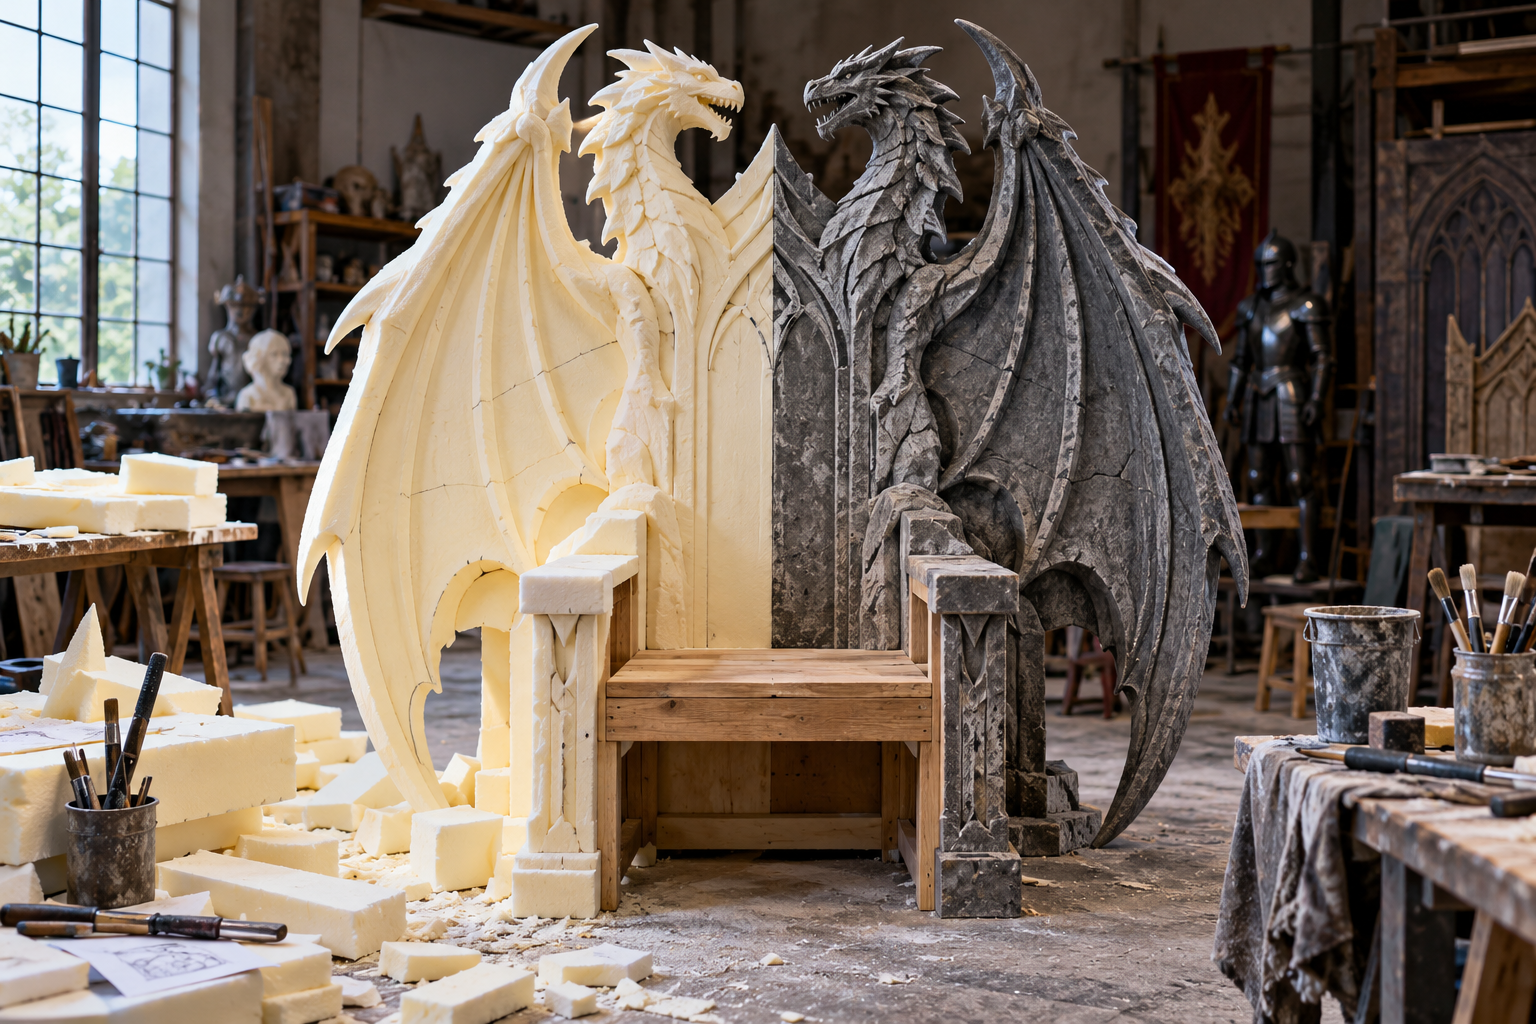
Scenic foam makes it possible to suggest monumental stone, tangled roots, enormous wings, or deeply carved ruins without reproducing the original material's mass. Foam & Scenic Construction explores how that illusion is developed through large forms, texture, coatings, and paint. Start by separating decorative volume from the structure intended to support the sitter. Then identify the actual foam product and test the complete adhesive and finish system on a representative offcut. A successful uncoated carving can lose its detail beneath later layers, while a seam that looked discreet in the workshop can become obvious under side lighting. This section considers modular construction, transport access, attachment points, vulnerable projections, and repairable surfaces alongside the sculptural effect. Look at the throne from the expected audience distance before spending time on marks. Material and venue documentation remain part of the brief, particularly for installed scenery. From rough blocks to a convincing finished shell, the strongest process keeps visual storytelling and practical handling connected, allowing a lightweight scenic object to feel substantial without confusing appearance with verified structural performance.
Throne Foundations
- Define which parts are scenic shapes and which separate frame supports the sitter before selecting foam.
- Identify the actual foam product; similarly colored sheets can have different compositions and application limits.
- Break the concept into large volumes before carving small scales, cracks, foliage, or architectural ornament.
- Plan seams where changes in form or decoration can help disguise them.
- Test adhesive, coating, and paint compatibility together on an offcut from the intended foam.
- Provide attachment points that connect decoration to its support without relying on an untested surface bond.
- Use full-size outlines to check whether the throne fits doors, staging areas, and its final display position.
- Choose carving methods from the material manufacturer's guidance rather than assuming all foam accepts the same tools.
- Build service and repair access into large scenic shells before their surfaces are finished.
- Document the complete scenic assembly, including foam, adhesive, coating, paint, support, and intended contact areas.
Royal Facts
- Scenic foam can create substantial-looking volume without duplicating the weight of carved stone or solid timber.
- A hard surface coating does not automatically turn a foam sculpture into approved occupant-supporting furniture.
- Rosco describes FoamCoat as a water-based protective coating compatible with specified foam and other substrates.
- A coating can soften fine carved detail, so the finished sample matters more than the uncoated carving alone.
- Rosco recommends building protective coverage over fine detail with successive thin applications of its FoamCoat product.
- A foam's appearance does not establish fire performance or acceptance by a venue.
- Separate scenic modules can simplify handling but leave visible joints that require deliberate alignment.
- Painted shadows can reinforce carved depth, although their effect changes with the actual lighting direction.
- Repeated public contact affects decorative edges differently from surfaces viewers only observe at a distance.
- A repair patch may need both texture and sheen matching to blend with an established scenic finish.
Royal Picks
- Make a layered sample showing the exact foam-to-paint system proposed for the throne.
- Keep a front and side silhouette template for checking carving progress against the approved design.
- Use a seam map to coordinate scenic modules with transport and reassembly requirements.
- Request manufacturer documentation for each adhesive and coating instead of relying on generic material names.
- Prepare spare decorative elements for projections likely to be damaged during repeated transport.
- Select carrying and storage arrangements that protect carved surfaces from concentrated pressure.
- Test the surface from expected audience distance before investing time in tiny details.
- Use contrasting temporary marks to distinguish attachment locations from areas intended only for decoration.
- Keep labeled touch-up samples and the final paint recipe for future scenic repairs.
- Confirm the venue's documentation requirements while choosing the assembly, before the finished prop arrives onsite.
Behind the Throne
- An oversized crest can be visually light while still becoming awkward to carry through a narrow corridor.
- A joint hidden in a carved groove may remain visible if its two sides reflect light differently.
- Surface durability depends on the complete system and use, not only the hardness of the final coating.
- A detailed sculpt can lose clarity under an overly uniform paint finish that ignores its larger forms.
- Scenic forms near hands and feet need different treatment from inaccessible ornament above the sitter.
- A lightweight shell can conceal a separate support frame, but its attachment and clearance still need intentional design.
- Texture scale should match the illusion: tiny cracks can make a monumental stone throne look like a small model.
- Reassembly can expose unpainted edges unless finish coverage is planned around each module's connection.
- A repairable throne often benefits from removable decorative caps instead of permanently integrated fragile tips.
- Transport planning can influence the sculpture from the beginning, reducing the need to cut apart a completed scenic shape.
Throne Wonders
- Create a giant stone-look throne whose scenic blocks reveal playful oversized carving when viewed close up.
- Design interchangeable foam crest panels representing different fictional kingdoms on one permanent support.
- Explore a tree-bark shell built around readable sweeping roots rather than uniformly dense surface texture.
- Build a sample wall comparing carved depth with painted depth under identical lighting.
- Develop a dragon-wing back divided into transportable sections along the apparent wing anatomy.
- Imagine a ruined throne with removable fragments that let one prop represent several stages of restoration.
- Create an ice-inspired scenic seat surround using translucent-looking paint effects rather than actual ice.
- Design a touring repair kit organized around specific modules and their matching texture samples.
- Explore a theatrical throne whose front appears carved from rock while its side view reveals an intentionally stylized silhouette.
- Document a before-and-after sequence showing how plain foam volumes become a richly finished ceremonial setting.
Throne FAQs
- Can someone sit directly on a scenic foam throne? Do not assume so. Distinguish decorative foam from an appropriately designed and reviewed occupant-supporting structure.
- Will any paint work on foam? No. Check the exact foam and coating instructions, then test the complete finish system on an offcut.
- Why did my fine carving disappear? Coating thickness and paint treatment can soften detail; test the finished system before carving the whole throne.
- Does a protective coating establish venue fire approval? No. Confirm the documentation required for the complete installed assembly with the venue.
- How should large scenic sections be divided? Plan manageable modules around access constraints, attachment points, and seams that the design can disguise.
- Can foam imitate heavy carved materials? Yes visually, using convincing large forms, texture scale, and finish; appearance does not establish structural equivalence.
- Why is a seam still visible after painting? Alignment, texture, coating thickness, and sheen can differ across the joint even when the color matches.
- How can I make repeated transport easier? Provide protected handling points, documented assembly, fitted storage, and replaceable vulnerable ornament.
- Should every surface receive equal detail? No. Prioritize the silhouette and visible focal areas, then add detail that remains useful at audience distance.
- What should the scenic handover include? Supply material records, assembly instructions, contact limitations, repair references, and relevant venue documentation.